Starting EndNote
Download to your device
EndNote for Windows and Mac is available to download on your device. You can access the links to the downloads and instructions from the Library EndNote webpage. You will need your College username and password to log in.
Access via the Software Hub
When using College PCs, or devices where you do not have the admin rights to install software, EndNote is available via the Software Hub (Windows only). You do not require a key or any installation instructions. Instructions on how to access EndNote via the Software hub can be found on the Library EndNote webpage.
Opening and creating EndNote Libraries
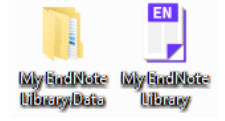
In EndNote each collection of references is known as a ‘library’. Each library is a separate file with the suffix .enl, and a folder with the same name as the library ending .Data. The .Data folder is created in the same directory as the library. Both file and folder must be kept together
To create a new library:
- Select New from the File menu. In the File name field, type the name of the new library and Save.
Backing up and compressing EndNote Libraries
You should back up your library whenever you have made changes or additions. If you create or amend filters, output styles or connection files, it is a good idea to back up the entire EndNote directory on occasion. You can save your complete library (the .enl file as well as its associated .Data folder and all of its contents) to a single compressed .enlx file in order to easily back up your library or send a copy to a colleague. Later, you can easily restore (unzip) the compressed library with EndNote.
To save to a compressed library file:
- Open the library in EndNote.
- From the File menu, select Compressed Library (.enlx) then click on Next.
- Use the file dialog to save to an EndNote Compressed Library (.enlx).
To restore a compressed library file:
- Use EndNote to open the .enlx file as you normally would to use the library.
To avoid problems with your library:
- Remember to keep both files together and create a backup of your Library.
- To avoid corrupting the file, do not save the library to the cloud.
Importing Terms Lists
It is recommended that before adding references, you import what are known in EndNote as Term lists. These are lists of stored terms such as journal titles and their official abbreviations, Author names and keywords. These enable you to cite them more consistently. Since different databases store the information differently e.g give the initials / full names of authors or the abbreviated / full name of the journal titles. Different reference styles require names to be displayed in different ways and importing term lists means that EndNote knows how to do this e.g. can abbreviate journal titles where the full name was imported and vice versa.
To import a text file that contains the terms:
- From the Library menu select Define Term Lists.
- Select the Lists tab, ensure the correct list is highlighted, and click on Import List. For Mac users locate and open the EndNote Terms Lists folder by going to Applications > EndNote20 > Terms
- Select the text file to be imported. For journal names, select the category that applies, and click Open. The new terms are imported and sorted alphabetically into the existing term list. This import must be done for each library that you want to use these terms.
- The lists are not exhaustive, so if you can’t find your journal in the list, this can be added manually by clicking on the Terms tab and then clicking on the New Term button.
The most commonly used Terms list is the Journals term list that stores abbreviated journal names that EndNote can substitute for the full journal name in a bibliography. Instructions on how to do this can be found in Changing the Format of the Journal Title. (add link to section)