The below instructions will help you create a a basic Qualtrics form / survey.
Give it a try
Log in
1. Log in to Qualtrics using your College username and password.
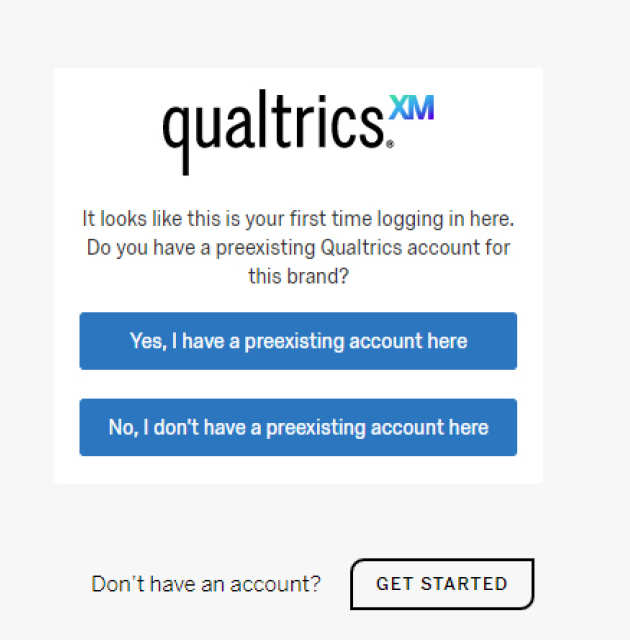
2. If you are logging in for the first time you will see the below screen. Choose No and your account will be created. (If you have logged in before click on Create Project.)
Create a survey
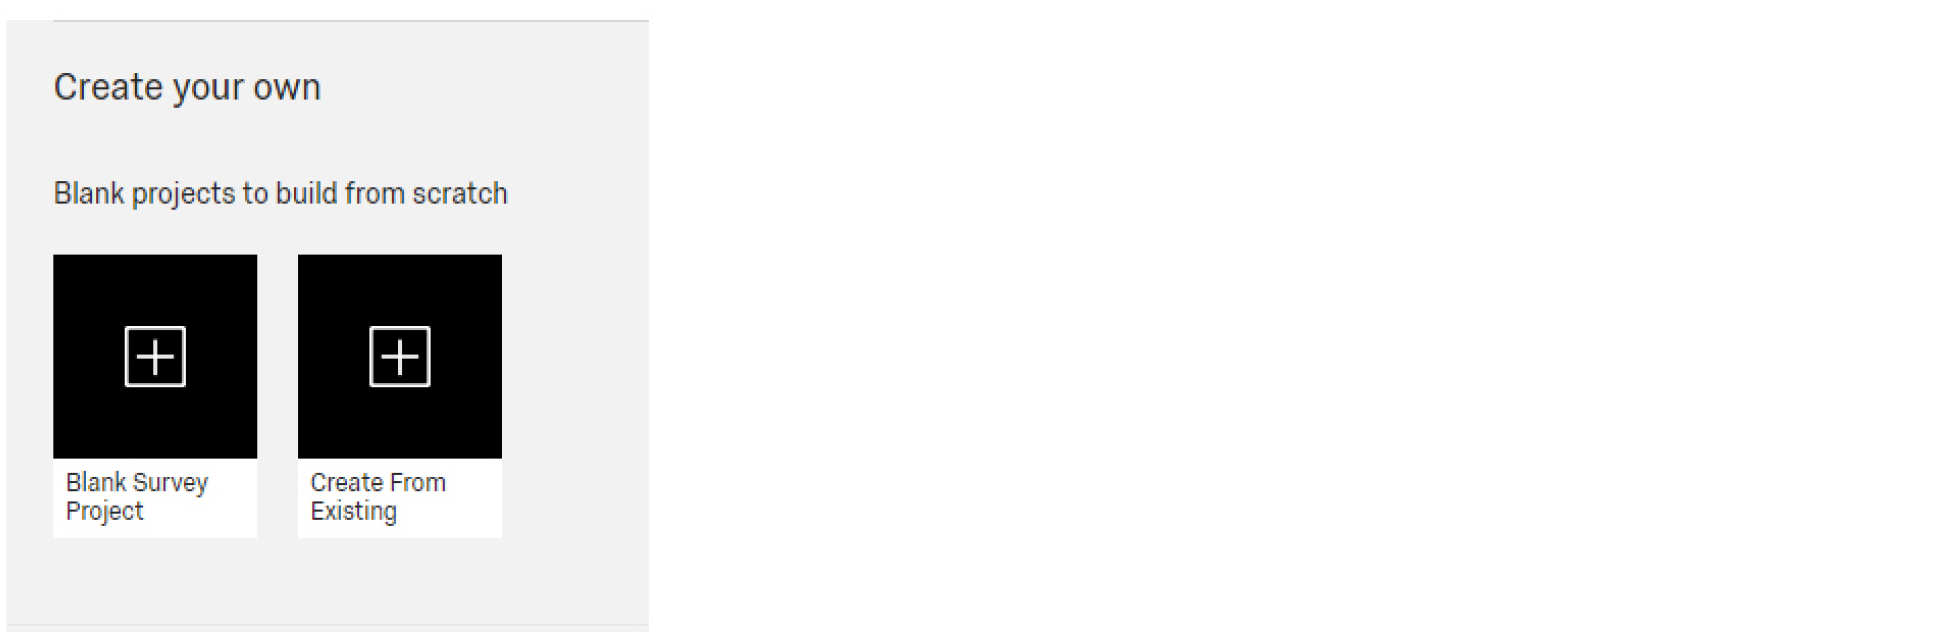
3. To create a new survey click on Blank Project.
 4. Give your survey a title by completing the Project Name field.
5. Click on Create project. This will take you to the Survey screen where you can start writing your survey.
Building your survey
6. You can see Q1 is the default Question Block, click on the default text and use the Rich Content Editor to type in your question. (Get Top tips on writing survey questions and Create accessible surveys)
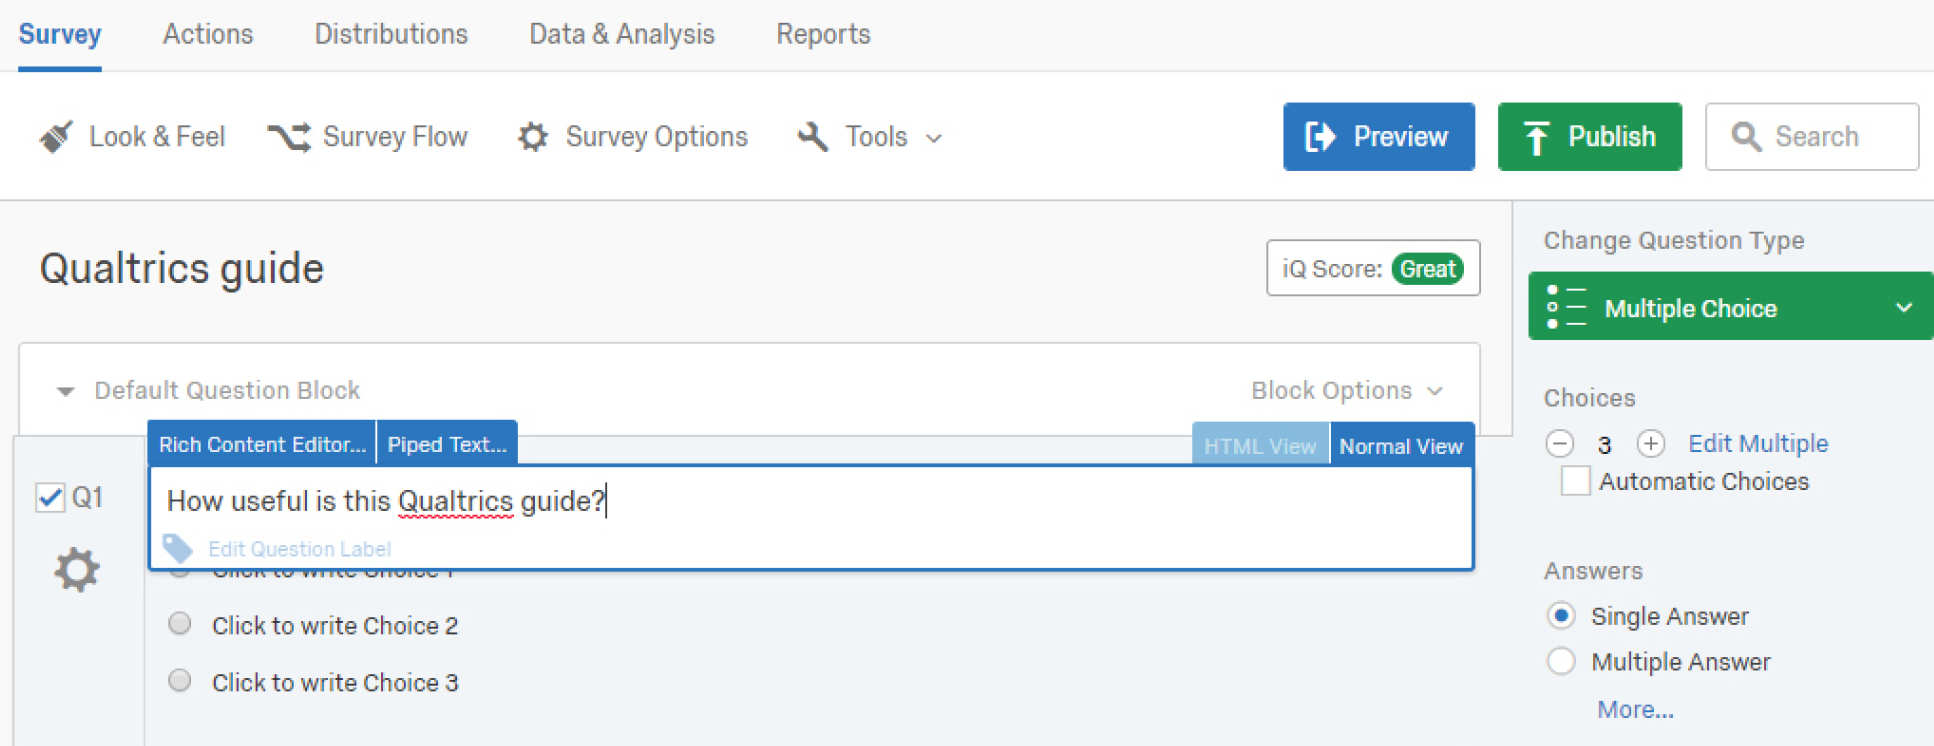 7. Question 1 default answers are set to multiple choice. Click on the default text to write your choices. (There are a number of question types available in Qualtrics for you to explore, you can change the question type see point 9.)
 8. To add another question. Just click on the Create a New Question button.
9. To change the question type from multiple choice navigate to the sidebar and click on the drop down menu. This will bring up a selection of question types to choose from.
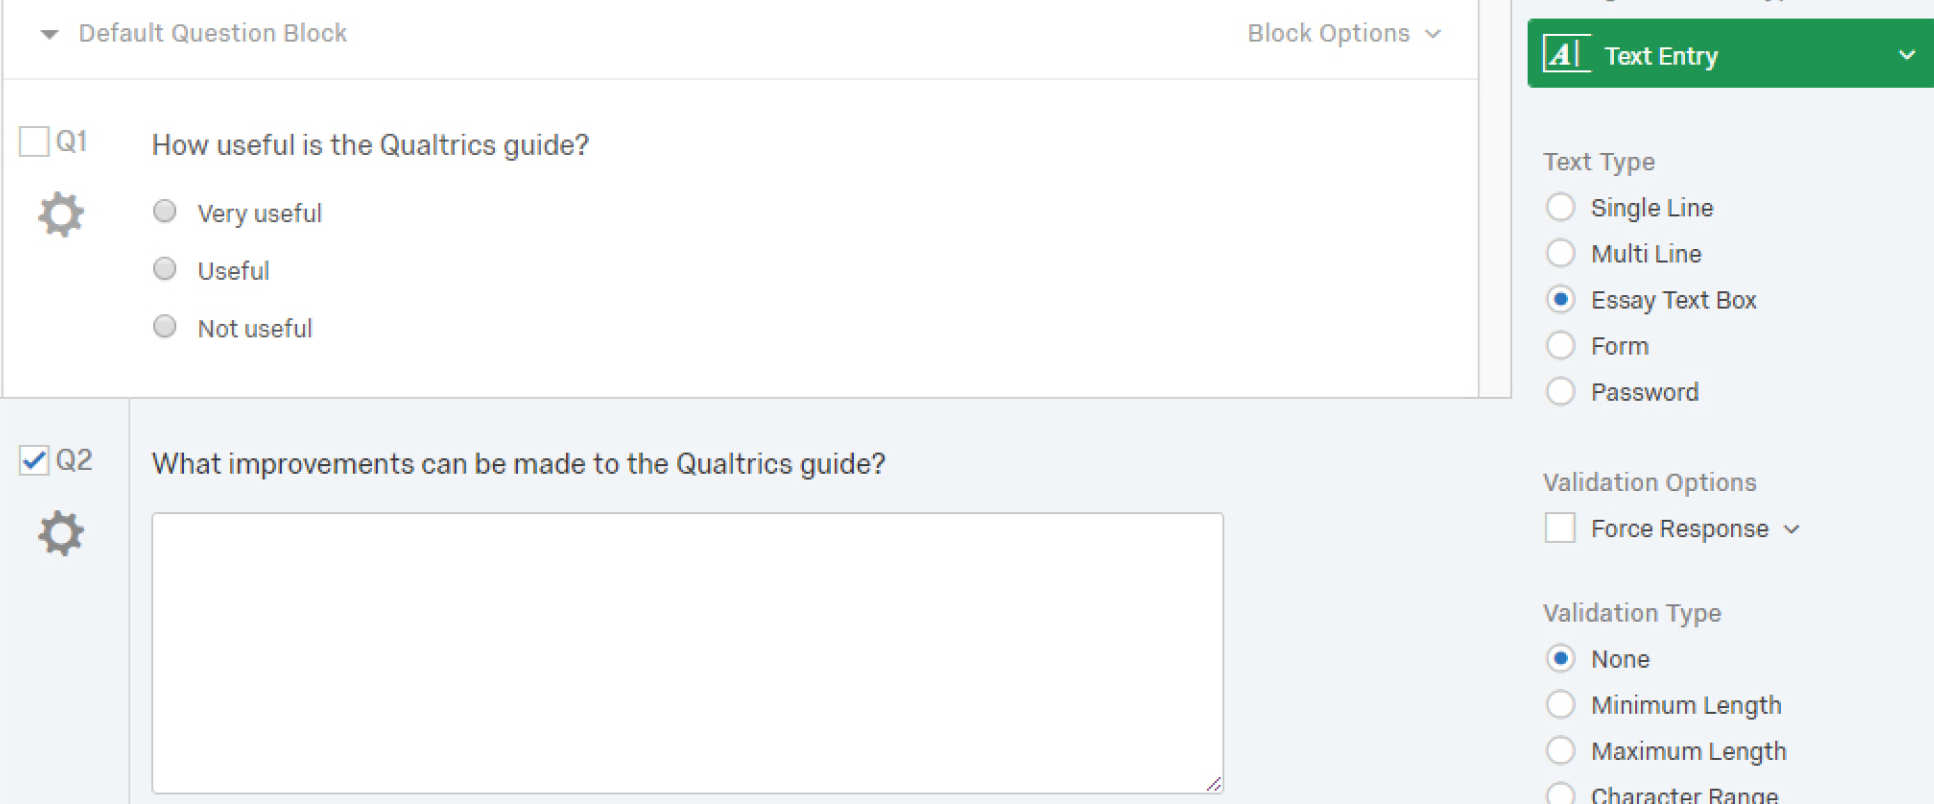
10. Select the question type you require, for example, Text Entry.
11. You can control the question's structure by selecting any of the Text Type, Validations Options and Validation Types from the sidebar. For example if you expect the text answer to be long then select Essay Text Box. You can drag the answer box to the size you want it.
Adding a submit button
It is important that the final button on your survey says Submit (not Next). To do this the final question in your survey must have it's own Block.
12. Scroll to the bottom of your survey
13. Click Add Block
14. Click Create New Question
15. Type your final question here
16. Click on Block Options to the right of the block
17. Type the word Back into the Previous Button Text box
18. Type Submit into the Next Button Text box
19. Click Save
20. Click on Next/Previous Button Text:
Changing the Look and Feel of your survey
Before you publish your survey / form think about how you want to distribute it, will it be via a T4 web page or using the Qualtrics URL link? We reccommend embedding your survey into a T4 webpage as it will then be responsive for use on mobile devices, but you must remember to change the theme first.
21. The default template is the static theme - Imperial College London. (Do not use any Qualtrics pre-set templates).
22. To change your surveys theme click on Look and Feel and select Theme.
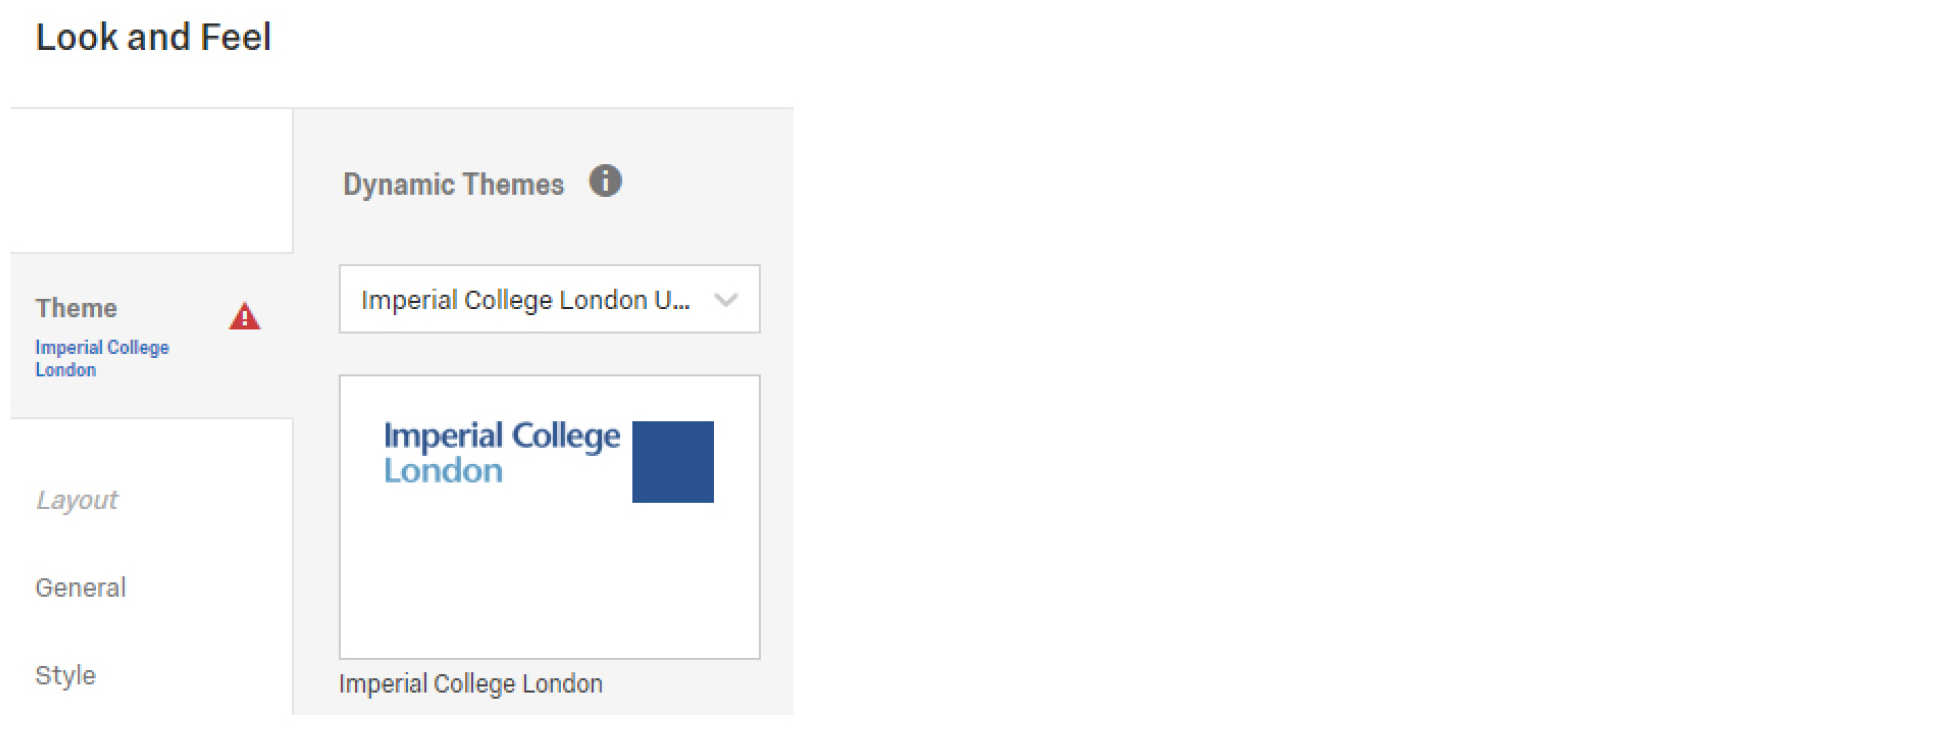 23. Scroll down to find the appropriate theme and click on it.
24. If you are embedding your survey into a T4 web page then select For T4 Web Pages theme. (It is a good idea to do this then your survey will be responsive for use on mobile devices.)
25. Click Save.
Collecting data
Before you publish your survey think about the way you want to collect the data. If you need to know about a response immediately or send a follow-up email to your respondents, Actions provide a simple solution.
Actions allow you to trigger tasks based on various events. For example, you can send an email notification to someone when a survey response is completed, and specified conditions are met.
26. Click on the Actions tab:
 27. Click on Add action.
28. Select Scheduled or Event-based - scheduled triggers start at a set time and can occur at regular intervals. Event based actions are triggered by a Qualtrics event, for example survey completion.

For the purpose of this training we will focus on Events based action for a survey response. But you can find out more about Scheduled actions from Qualtrics.
29. Click on Event-based.
30. Click Survey response.
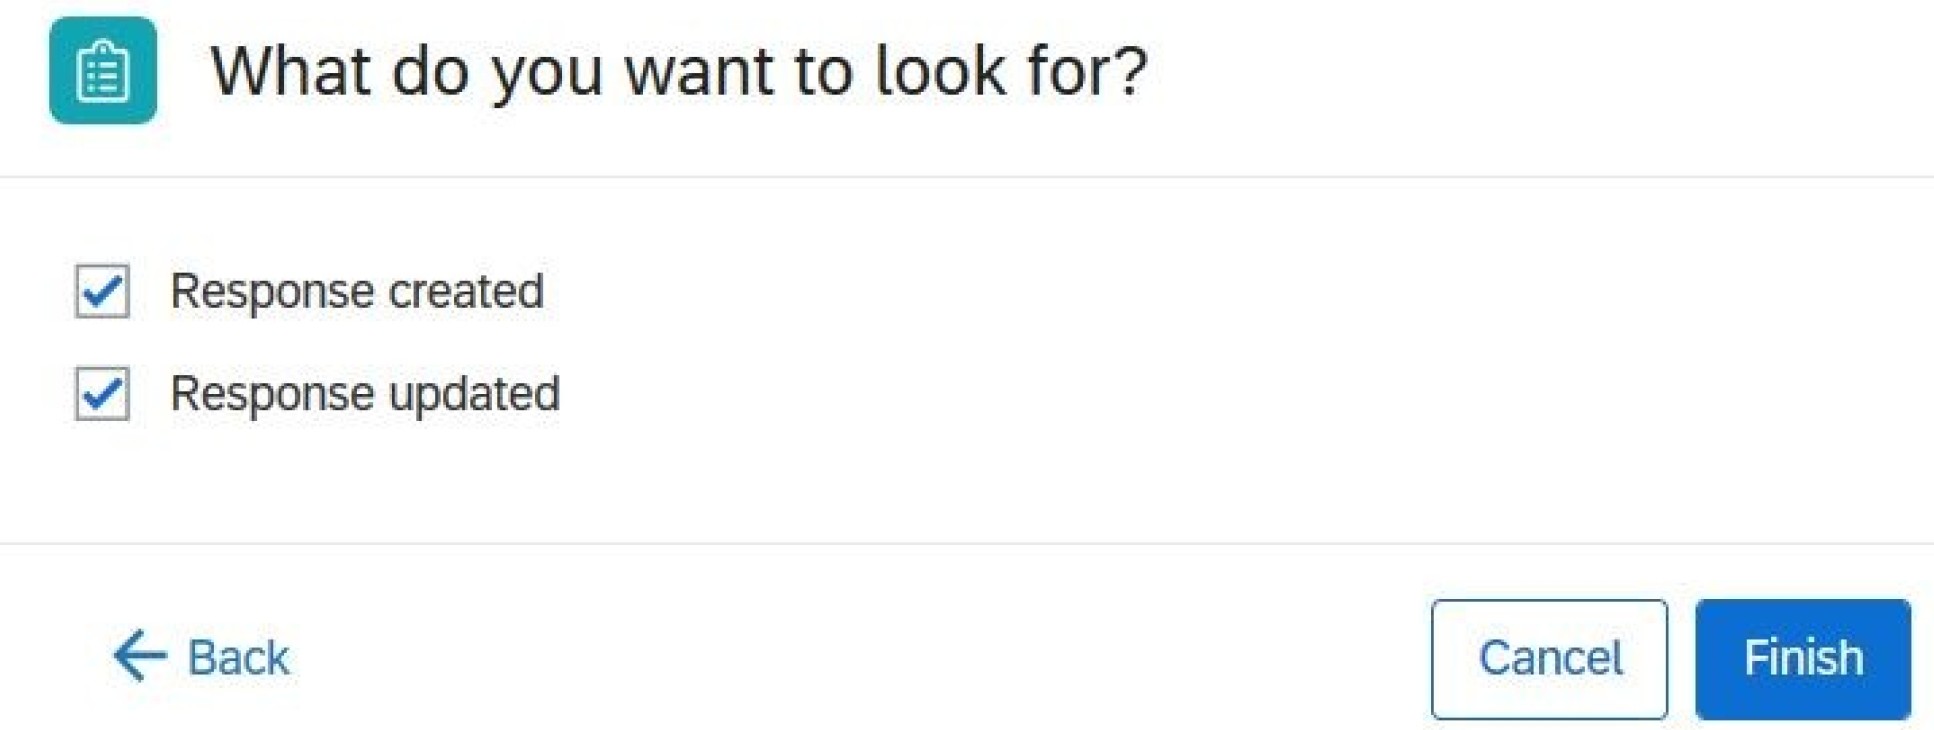
31. Decide if you want to trigger the action upon; the user creating a new survey response or a user editing a response or both. Tick the relevant boxes and click finish:
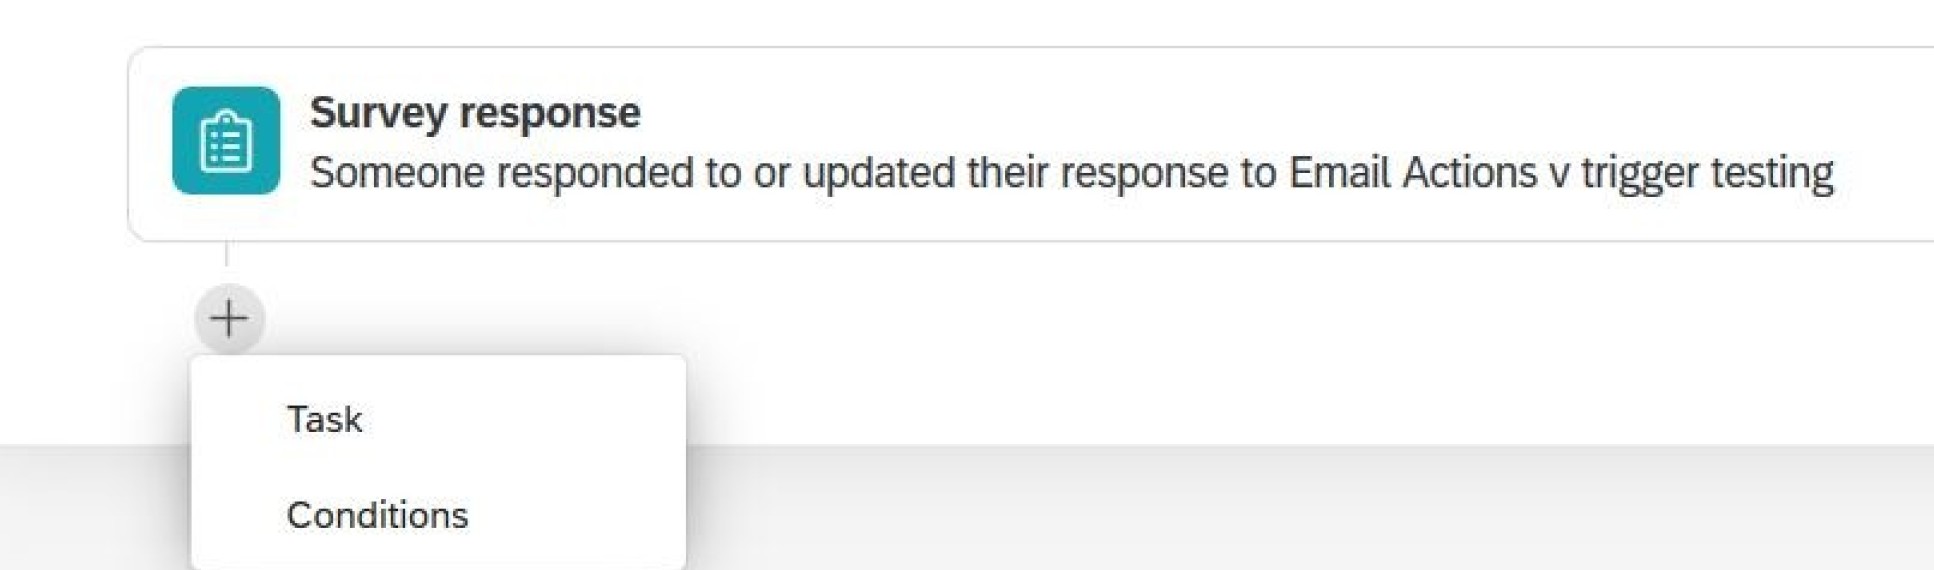
32. Click on the + sign and click task.
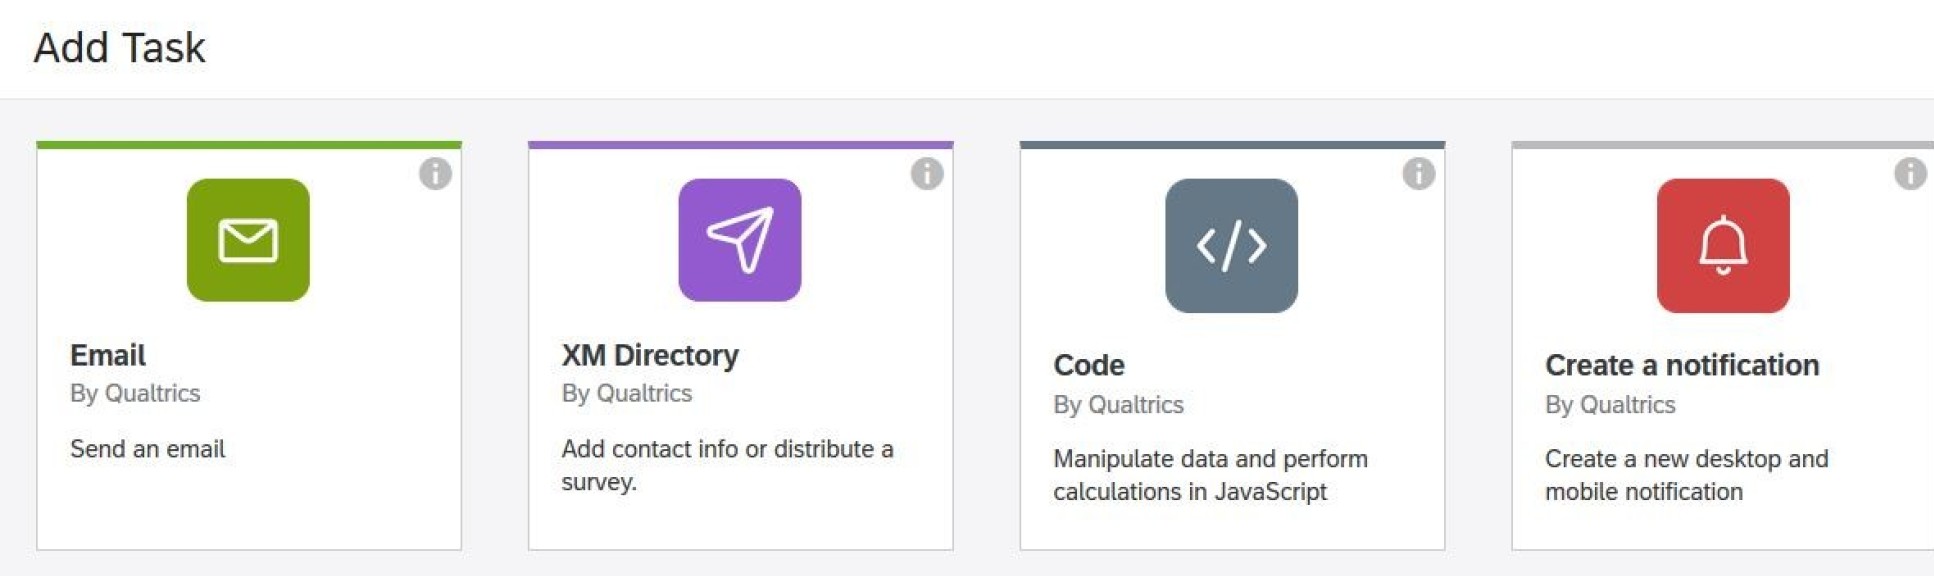
 33. Click on Email.
 34. This editor screen will appear:
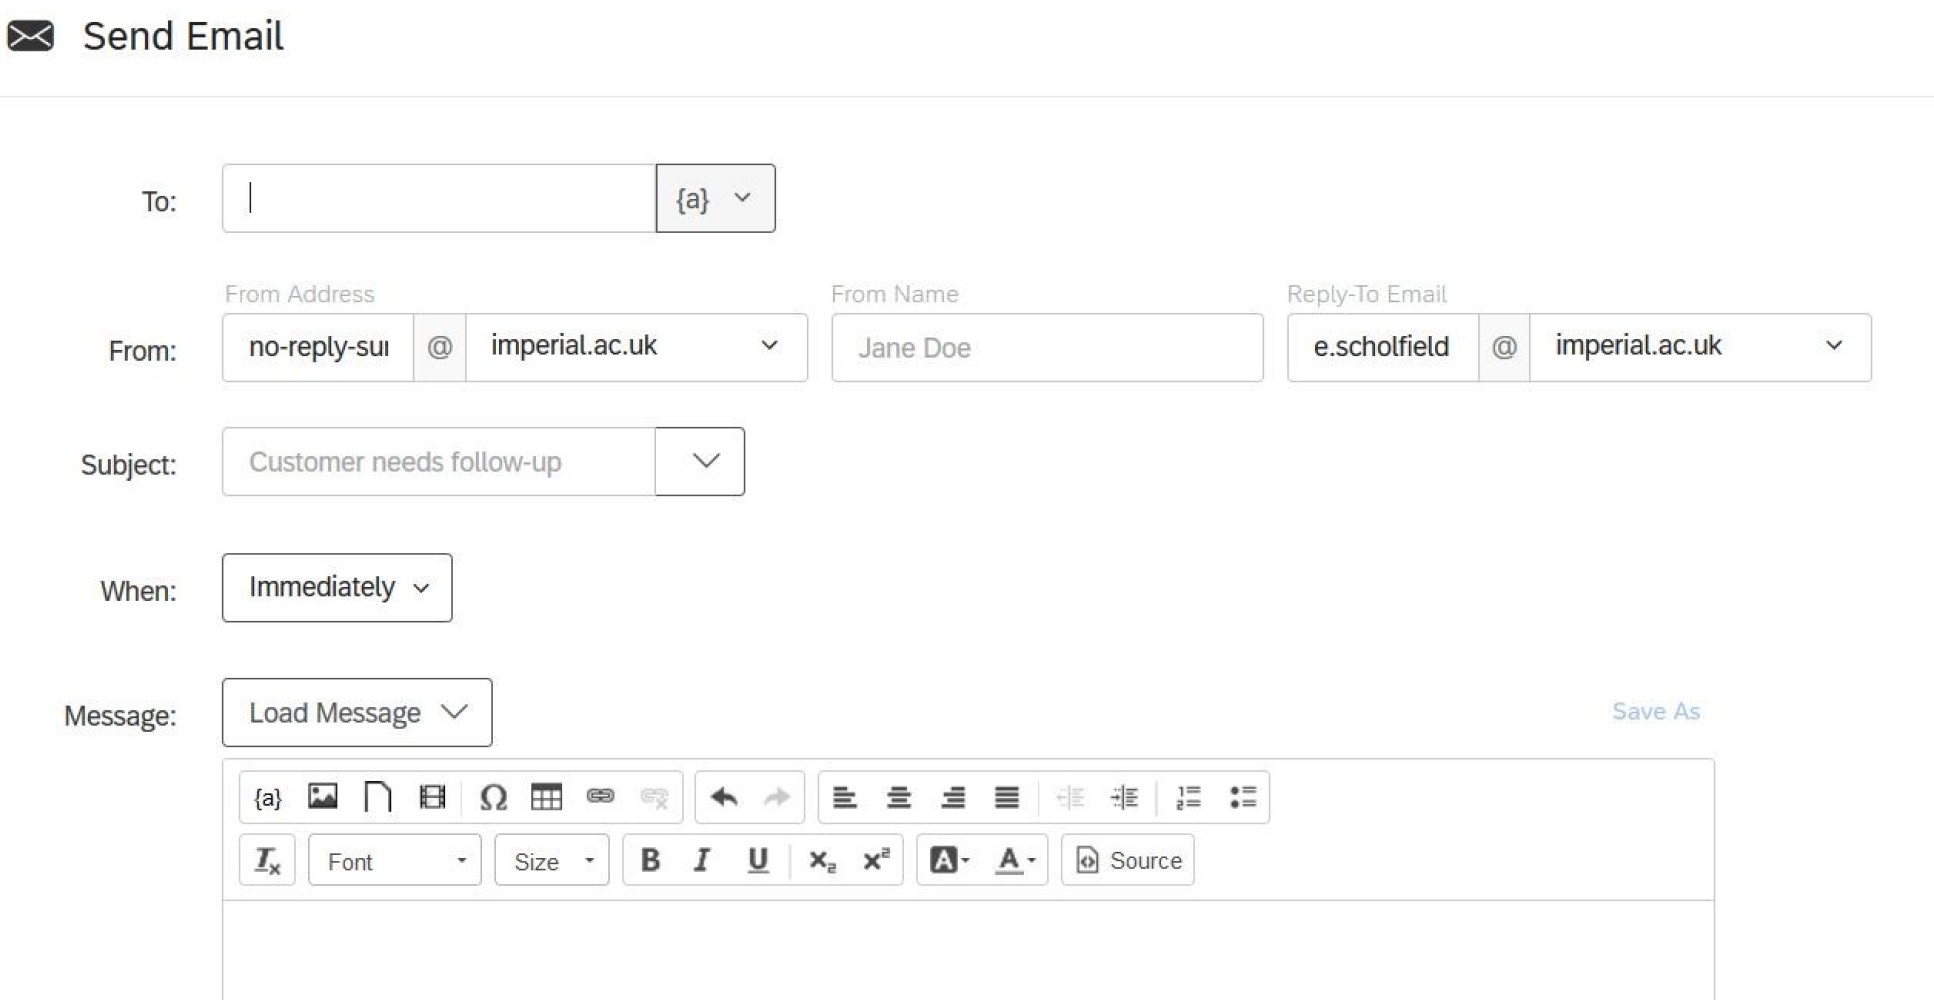 35. Complete the form. You can type a message by using the rich content editor features to customise your message. You can pipe respondents emails in to the To field.
36. Select the When dropdown menu to choose how long of a delay should be applied to the action. By default, it will send immediately after a respondent finishes the survey, but you can choose different delay times from as short as one hour to as long as 28 days.
37. Decide if Include Response Report or Include Data is appropriate for this email.
38. Click Save to save and return to the Action tab.
(Once your form / survey is published the data will also be collected in the data and reports area.)
Recommended survey improvements
- You can make improvements to your survey by adding a back button, setting an expiration date and creating a custom end of survey message. This can be done in the Survey Options tab at the top of the page.
Next steps
Now you have built your survey you can look at Publishing a form / survey.