The Flexible Content Block content types are designed to allow you to mix and match different types of content in a grid on your page. As the name suggests these blocks are very flexible and can include a combination of content like General content, Column blocks (link lists), Column colour blocks, News and events manual block sidebar, and a single event listing.
Flexible Content items automatically organise in rows of two and/or three depending on a) how many are added to the page and the b) device screen size (mobile, tablet, desktop etc.).
You can use any combination and number (up to 12) using the following items:
- Flexible image and text cards
Add a linkable image block with overlapping heading and text. This flexible item should not be mixed with any other type of flexible content, as it will not display correctly. - Flexible item - Column block
This allows you to add a block of links similar to one of the columns on a 3 Column block - Flexible item - Column colour block
Add a single block containing an optional image, heading with a single paragraph of text and a link. This is the similar to a column in a 2 Column colour block. - Flexible item - General content block
Add a block with an optional image and some general text. This is similar to a single column in a 2 column general content block. - Flexible item - manual News & Events
Adds a single manual news and events item. This is similar to the News and events manual block sidebar - Flexible item - Twitter
Adds a block with a twitter feed.> - Flexible item - single Event listing
Allows you to pull through the details of a single event
See an example of the Flexible content block using all the options at the foot of this page.
Instructions
Adding Flexible content blocks to your page consists of 3 main steps - creating the folder structure, adding your flexible items and adding a widget to the page where you want to display the content.
Step one: create the folder structure for your Flexible Content
1. Add a hidden sub-section to the page where you want your Flexible content block to appear and call it FlexibleContent - this must be spelt correctly, with the capitalised 'F' and 'C' and no additional characters such as spaces or fullstops.
The combination of hiding this and giving it the precise name prompts the system to not treat it as a page. Instead, it treats it and any sub-pages as special repository folders. Do not place content in this 'FlexibleContent' folder. See No. 2.
2. Next, create another hidden sub-section under the FlexibleContent section you've just created. Call this second subsection something to help you identify what it is about - for example, 'FAQ' or 'Safety procedure'. I've called mine 'Example items'. However, it MUST NOT be called FlexibleContent.
It should look like this:

Step two: add your Flexible items to the folder you created
The subfolder you created under FlexibleContent (in my example it is called Example items) is where you add the individual Flexible items to build your Flexible Content block.
At present there are 6 different flexible item content types available. You can add them in any combination you like.
- Flexible item - Column block
- Flexible item - Column colour block
- Flexible item - General content block
- Flexible item - manual News & Events
- Flexible item - single Event listing
- Flexible item - Twitter
1. On the site structure screen, navigate to the sub folder (mine is 'Example items') click the blue Actions button on the right of the screen and select Create content from the menu
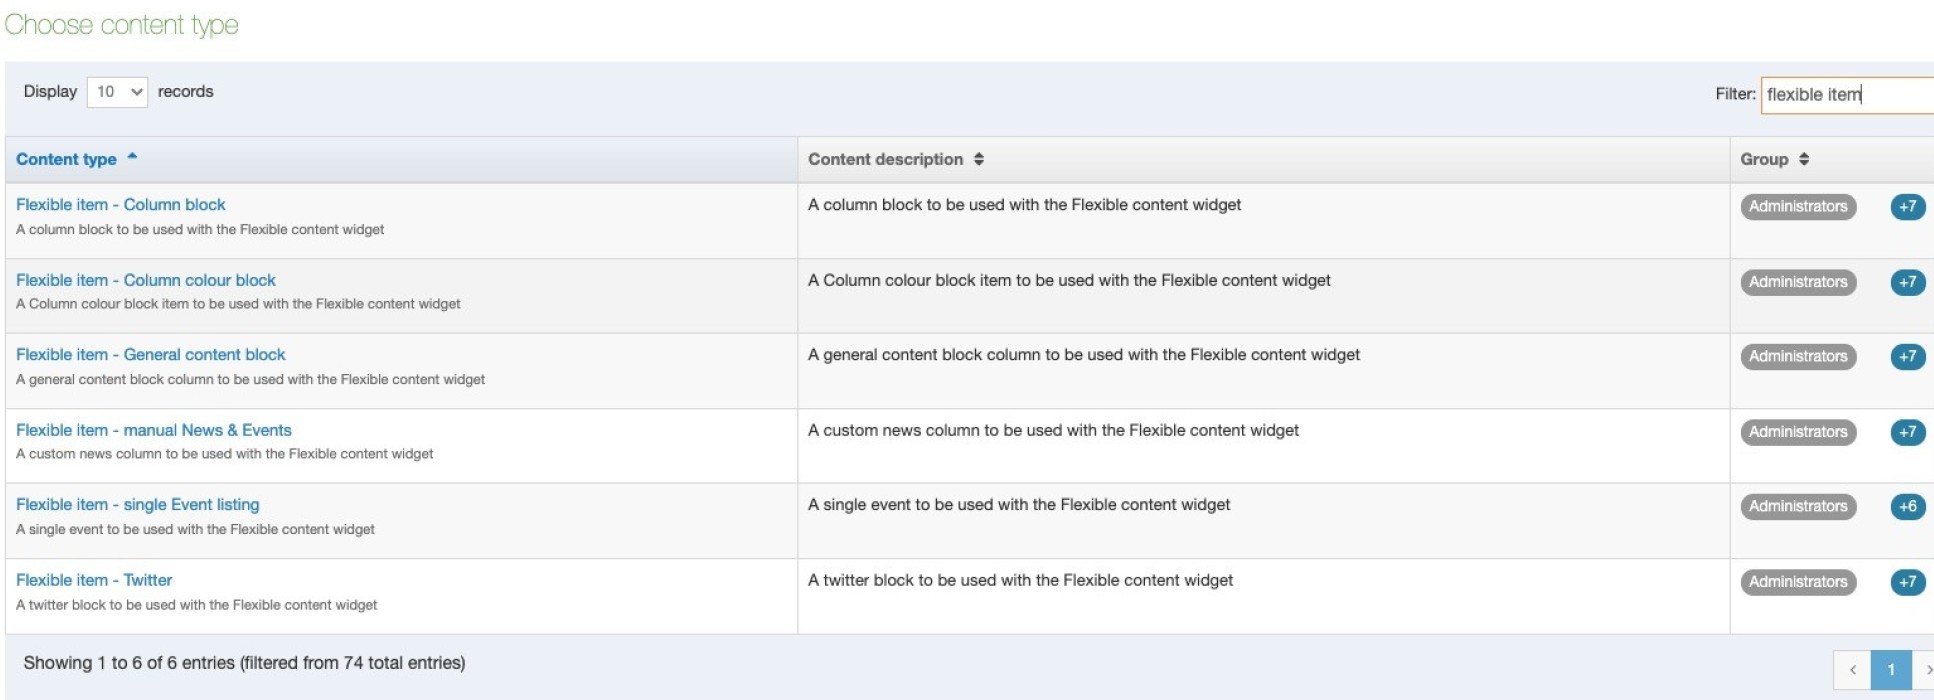
2. Find the 'Flexible item' you want from the complete list of content types as shown below. You can do this by filtering the list by 'flexible item'.
3. Click on your chosen content type.
4. Complete the fields as required within the Flexible item.
Please note: The Up and Down ordering arrows do not work in the Flexible items so you need to use letters to order your items. This is similar to the ay you would name accordion or slideshow items. The Name*: field for the first item should start with a - e.g. a - research centres , the second item should start with b - e.g. b - research networks, and the third should start with c - and so on.
5. Select Save and approve.
The image below shows the items used in the real example at the foot of this page.

There are a maximum of 12 items for each sub folder, if you want more than 12 items on a page, create a second sub folder next to your first one and use a separate widget for each separate sub-folder.
Step three: add the Flexible Content block to the page where it will display
Now that the items are in their sub folder you need to add the Flexible content block onto the page. To do this you will use a widget. This is similar to accordions, slideshows and people lists.
1. Open t4 Site structure (click on the terminalfour logo in the top left of the screen), find the page where you want the Flexible content block to appear, click the blue Actions button and select Create content.
2. Select the Flexible content widget content type and complete the form as instructed below:
| Field title | What should I do? | Is it compulsory? |
|---|---|---|
| Name * | Give your Flexible content widget a name, e.g. 'Main links block'. This is for reference for editors of this page only. Users never see this. | Yes |
| Block Title* | Enter a title for your Flexible content. For example, 'Main link list'. The block title is a mandatory requirement. It is important for accessiblity for visually-impaired users who use screenreaders to read web pages. You don't need to show it on the page, see below. | Yes |
| Show block title | If you want the block title to appear to all users, put a tick in the 'Show block title' box. You can hide this title from users who are not visually impaired by deselecting this option. | No |
| Fixed column width | Setting this to 'On' ensures that all block items are the same width. If it is left blank or set as 'Off' then the items will automatically adjust to fill the full width of the screen. Find out more about Using fixed column widths. | No |
| Find items * | Tell the widget where it will find the items for this Flexible content. Press 'Add select link', then find and select the folder where you added your items. This will be the hidden sub folder that you created under the 'FlexibleContent' folder. In the previous screenshot we looked at, this folder is 'Example items'. | Yes |
| Use default link text | Defaults to ticked and should be left ticked. | No |
| Display items * | Defaults to ticked and should be left ticked. | Yes |
| Border | If ticked this will add a full page width border line above the flexible content. | No |
| CTA title | This adds a single link above the flexible items. This may be useful if you want to direct users to another page for further information. For example, you may have a few flexible colour blocks linking to some key services, but you don't want to include all of them. You could then add a link to another page which lists all services. | No |
| CTA internal link | Use Add section link to link this to another web page in T4. | No |
| CTA external link | Add a URL to a non-T4 web page . | No |
Your completed form will look like this:

3. Select Save and approve.

Important: When you publish your page, remember to publish the entire branch to include both the items and widget, otherwise your content will not show.
Flexible content item examples


Flexible item - General content block
Veggies es bonus vobis, kohlrabi welsh onion daikon amaranth tatsoi tomatillo melon azuki bean garlic.
Gumbo beet greens corn soko endive gumbo gourd.


Further guidance
You can get more examples and understand the benefits of using the flexible content block.
If you need more help please Contact us.